|
|
Who should do BSE? Anyone that has breast tissue. It would not hurt for men to do it as well. About five THOUSAND men were newly diagnosed with BREAST CANCER last year. When should someone start doing BSE? As soon as they have swelling in their breasts. That would mean puberty. It is ideal to start learning the inside of your breasts when they are new and just starting to develop. As long as you are feeling pretty much the same things in both breasts, that would generally mean normal developing tissues. The younger you get started, the more likely you will develop the good habits of doing BSE the rest of your life. It may help you to live an extra long life without breast cancer. BSE does not prevent breast cancer, but it may find it before it gets deep enough to cause major harm. The part of the month that you chose to do your monthly breast self examination is important, and is more important if you are pre-menopausal. Breasts can be very sensitive at certain times, due to your menstrual cycle, and you are the one that can best determine when you are least tender. Most women have the least amount of discomfort if they wait until seven to ten days following the first day of each menstrual flow. That is likely when the fluid retention (bloating) from your period is at its lowest. If you are comfortable doing it any time during the month, then choose a day in relation to the beginning of your period, and do it on that same day every month. That way you will have a built-in reminder. Your breasts change a lot during the month (cyclical changes), and you will feel different things inside your breasts at different times of your menstrual cycle. If you are postmenopausal, just pick an important day of the month and do the exam on that day of the month every month. There are three general procedures to go through as you do a proper BSE: VISUAL, POSITION, and PALPATION (a fancy word for feeling for changes with your fingers). We will look at each procedure individually. VISUAL: During this procedure you are going to simply observe your breasts. Really look at them. You likely do not look that closely at your breasts. By following these suggestions, you will be able to examine your breasts in many positions and at different attitudes, and many times that is enough to see a problem that when brought to the attention of your breast-health professional you may be able to avoid serious breast-health issues like breast cancer by treating it as early as possible. To start the exam, remove any clothing that is above your waist (or perform this when you step from the shower and have toweled off) and stand facing a mirror. A triple mirror, similar to what you might find in a clothing store would be excellent, if you can acquire one. The area should be well lighted, so plan to do this when the light from the window is best or be sure to have a good lighting fixture near the mirror(s).
Stand facing the mirror with your arms hanging down to your side. Look for any change in your breasts, from what you observed the last time you checked (last month, right?).
Slowly turn to each side to allow a full view of both sides of both breasts. Again, check for all the items mentioned above.
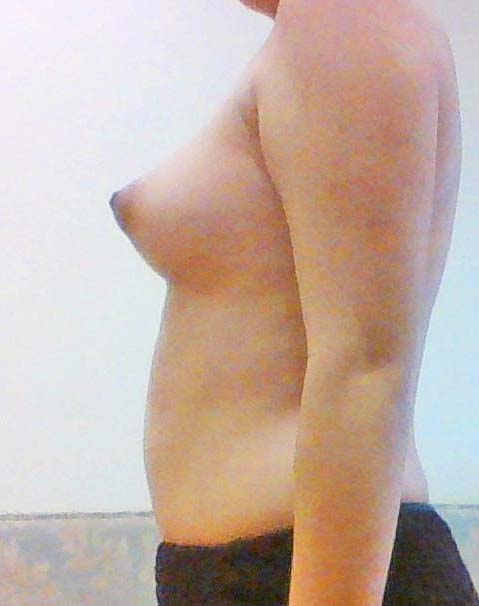
Continue to stand facing the mirror and lift your arms up over your head (like "its a hold up... stick 'em up). Hold them there and look for the same symptoms listed above.
Continue while slowly turning to each side. Don't be in a rush… move slow enough to see everything. Continue to check each of the features mentioned above.
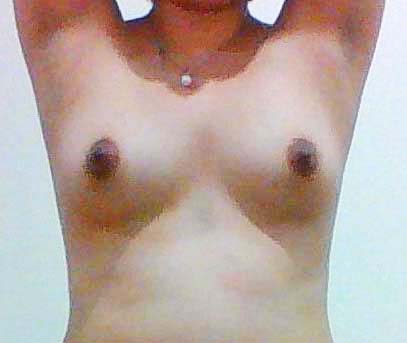
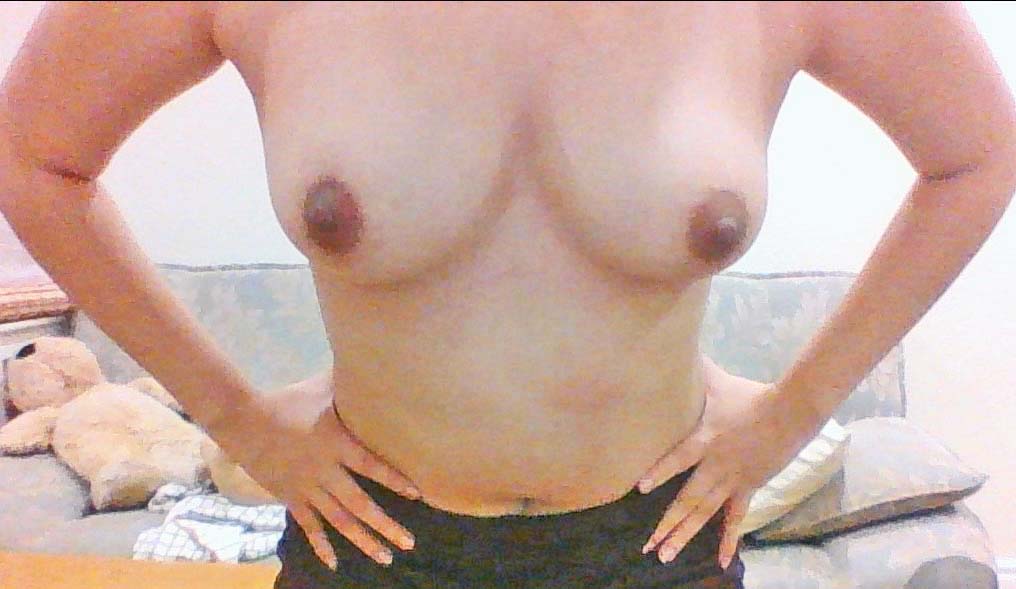
While still facing the mirrors, place your hands on your hips, and push inward and downward, flexing the chest muscles under your breasts. Again, look for the same symptoms listed above. Look for any bulges in your breasts that show up when you press in and down onto your hips.
Turn to each side. Look for the usual symptoms, then flex your breasts by pushing down. Do this for each side.
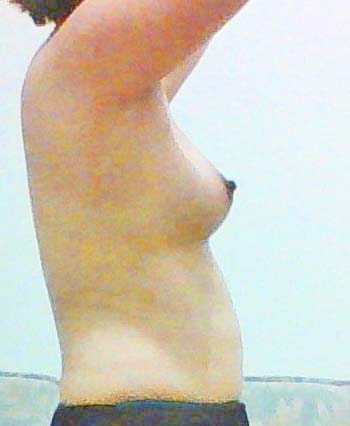
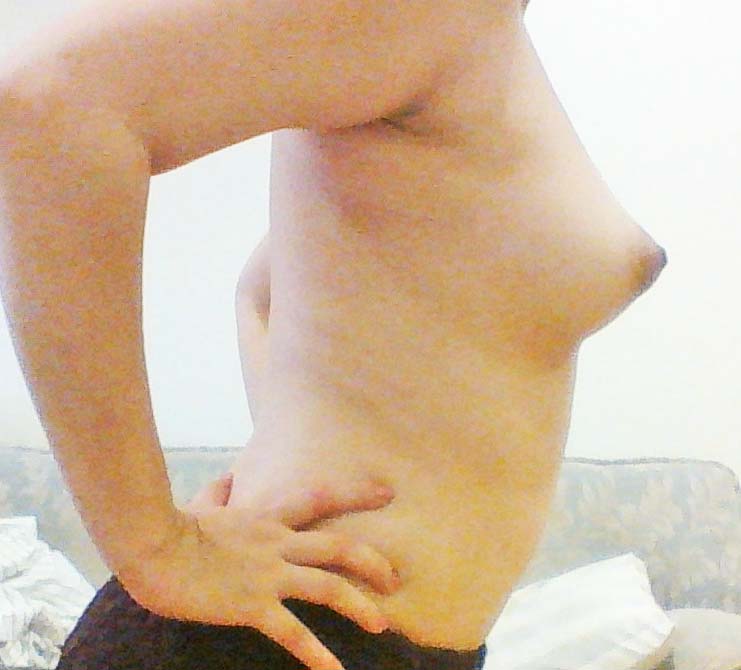
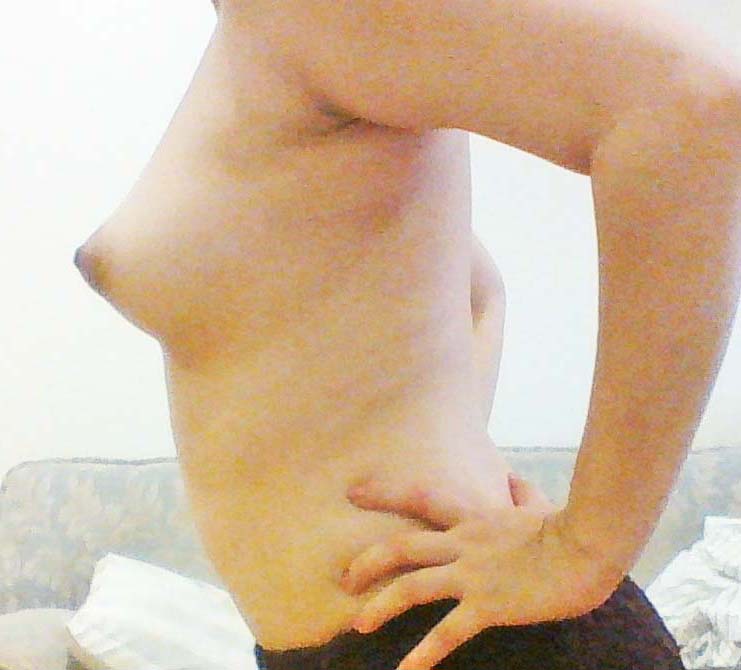
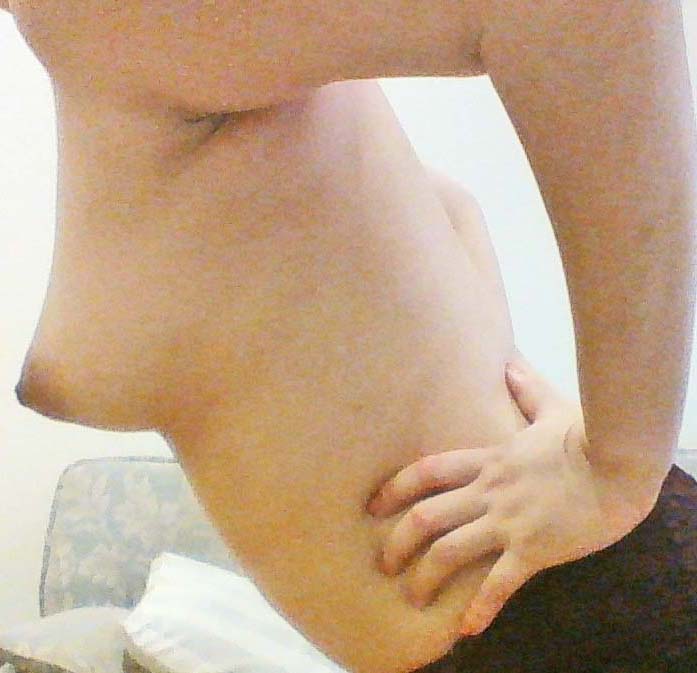
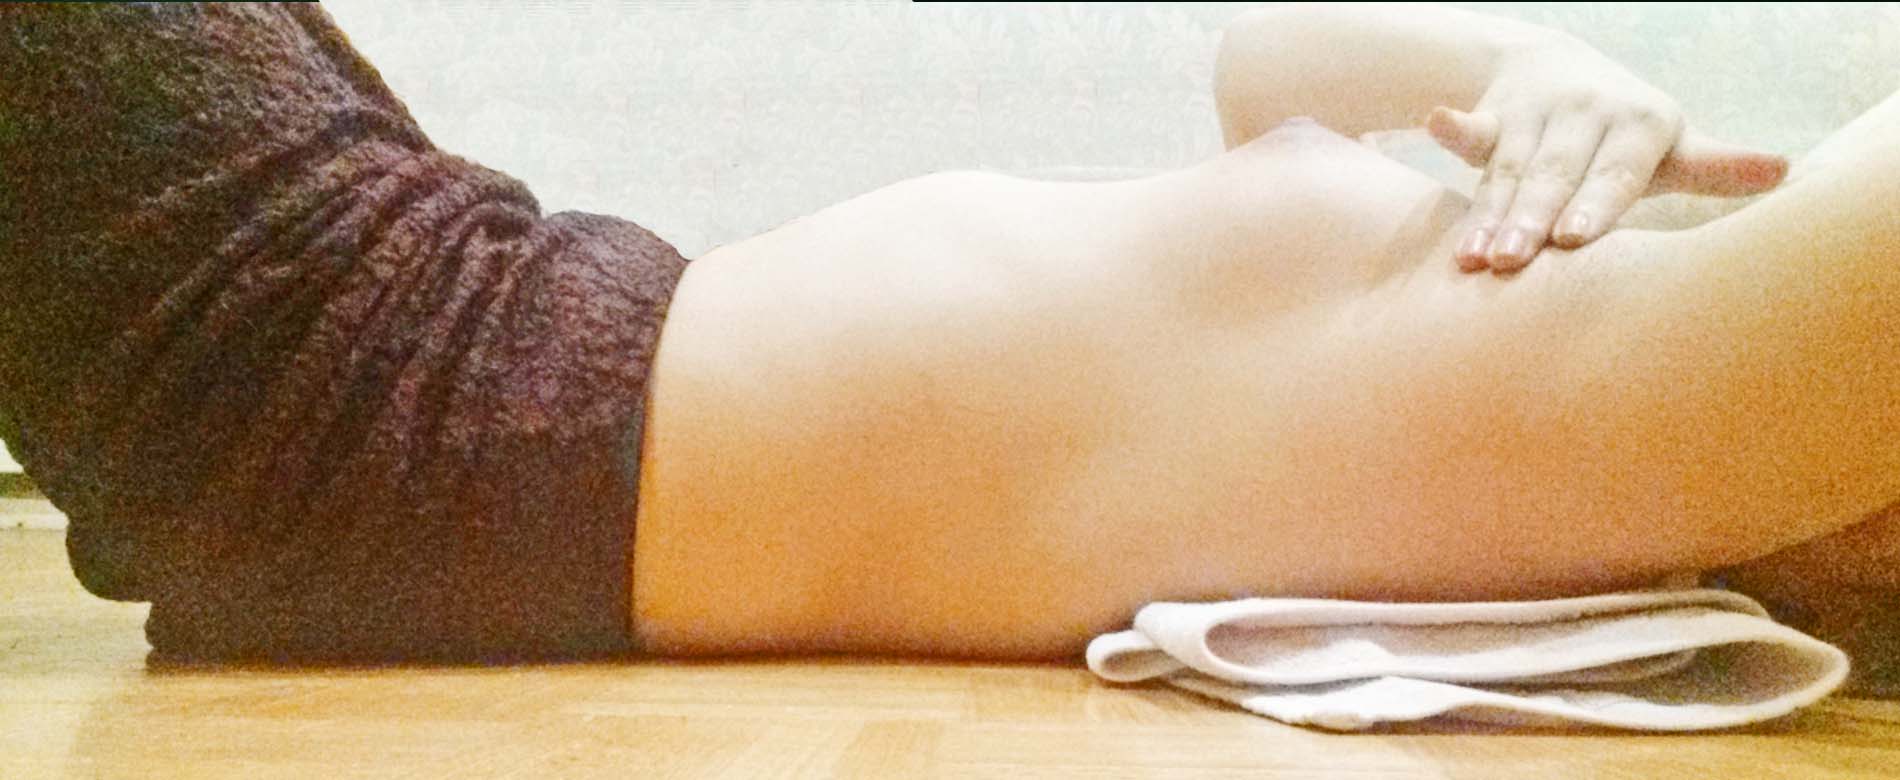
Watch the breast surfaces as they move. You are looking for the same symptoms listed above. You may also try locking your fingers together and pushing your hands together or pulling them apart, to flex your pectoral muscles behind your breasts, as the photos below show:
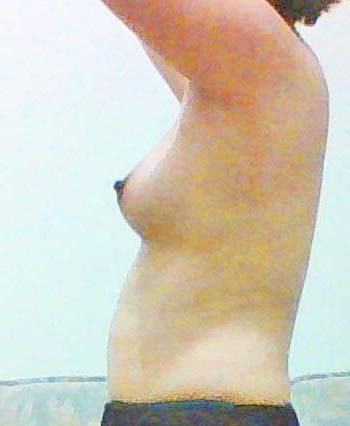
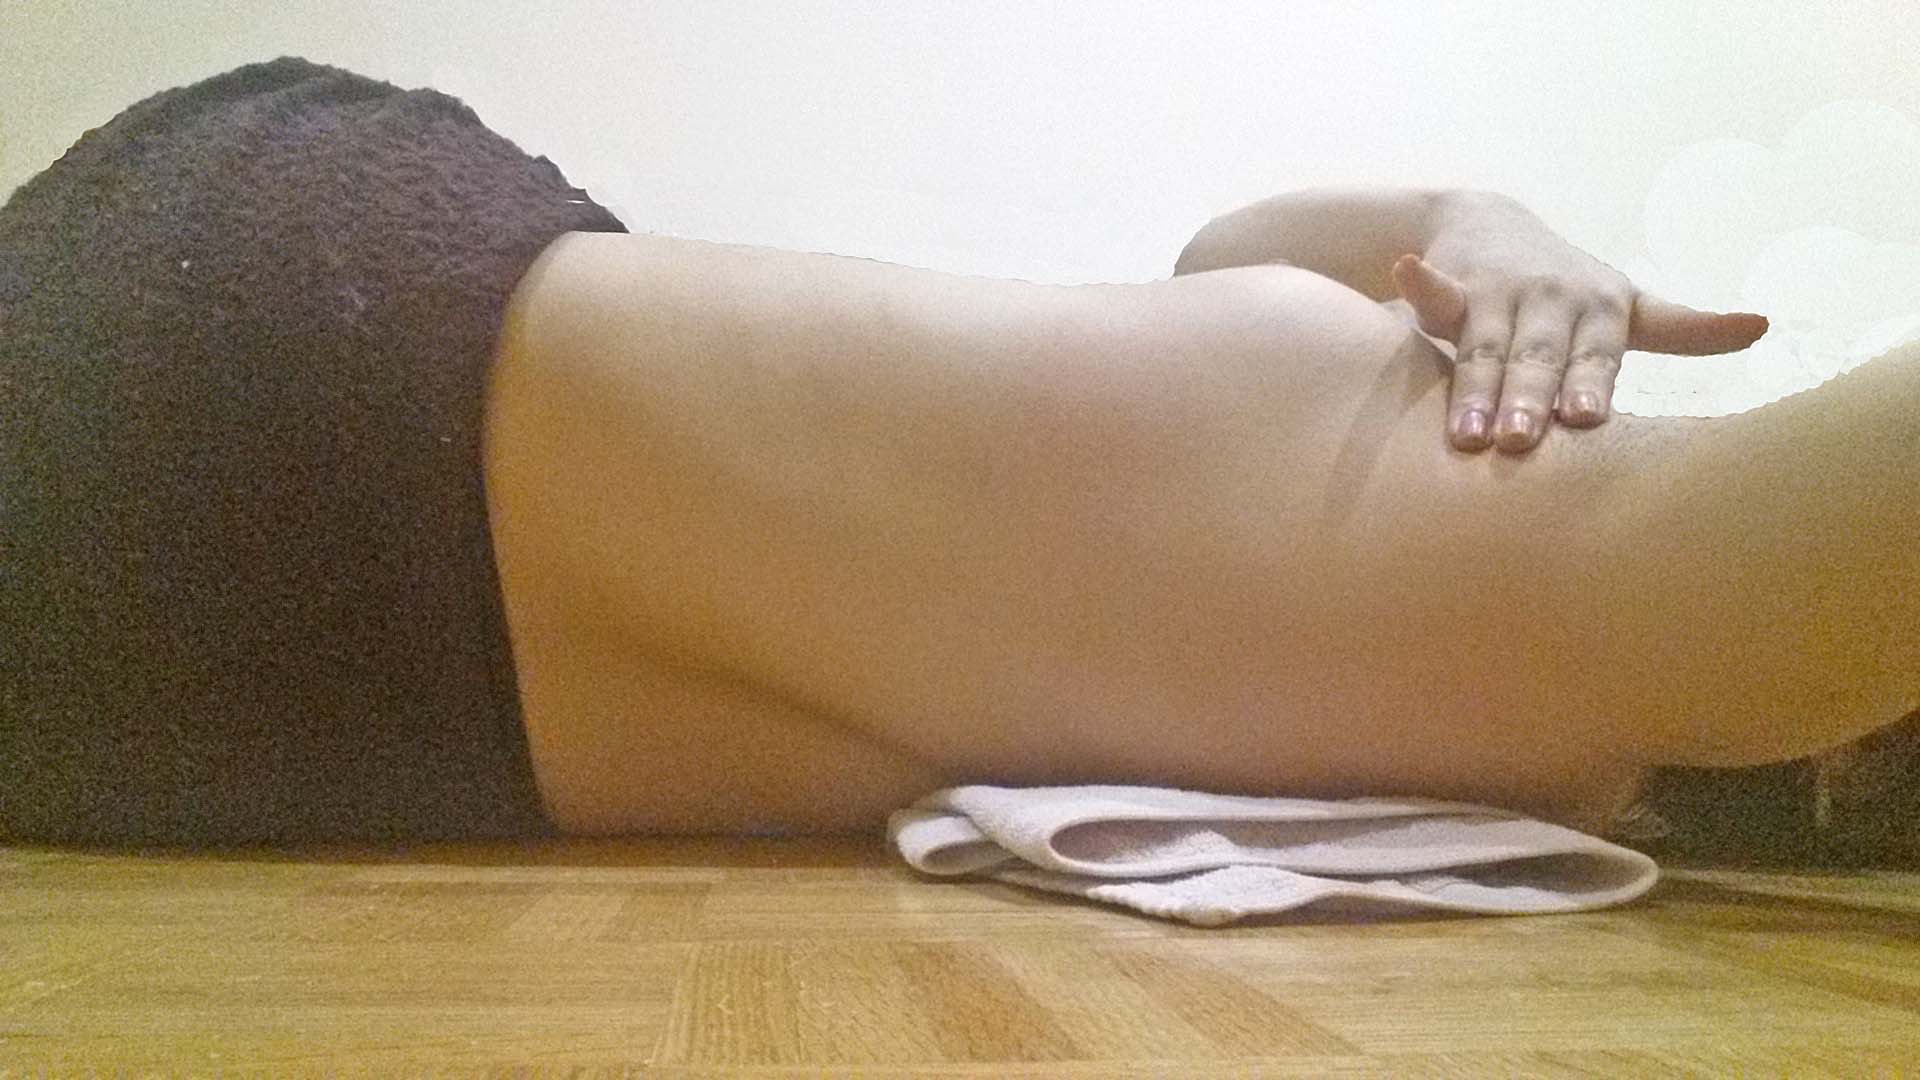
Lean forward enough that your breasts swing away from your chest wall. They should literally hang freely. Move your body enough to allow your breasts to swing left and right as well as forward and backward while they are hanging down.
Turn to either side and repeat above movements while observing for any changes in the surface of your breasts. Check also for the symptoms mentioned with the first image.
If your back will allow it, leaning even further forward than these images would be good as well.
If you saw anything at all that was different from the last time you looked, call your breast-health professional today. They may be able to simply point out to you that your 'problem' is normal development, and you can relax. Or they can treat it before it gets worse. The second procedure is getting your body into a position so that you can do palpation on your breasts. This is where you 'look' inside your breasts by feeling what is inside. Remember, you are 'looking' for anything that is different from the last time you felt them.
POSITION: When you do palpation you can do it while you stand in the shower, while you stand in front of a mirror, while you sit and watch TV, or while you lie on a flat surface such as your bed or massage table. It is good to do it both when standing and when lying down as you may find abnormalities while standing that are not able to be felt when lying on your back. In the palpation section we will describe how to palpate when you are lying down, and you can easily transfer that information to palpation when standing or sitting. To assume the Prone Position, which is most likely what you should do, lie on your back, on a bed or other flat surface. To examine your left breast, elevate your left shoulder with a folded towel. The thickness of the folded towel should be adjusted so that your nipple faces directly toward the ceiling. Place your left hand behind your head, and lift your knees up and place your feet flat on the surface upon which you are lying.
If too much breast tissue falls to your side and under your arm, and your nipple is not pointing directly up toward the ceiling, you may need to assume the Side-lying Position. Using that position to examine your left breast, follow the directions for the Prone Position, and then lay both your knees over to the right, to lie on the surface, and then make sure your left shoulder is still down on the folded towel. You may need to add another towel to make it thicker.
You can see that the side-lying position is too much for this model. Her nipple points straight up in the Prone Position, but toward her right in this position. If she had a larger breast, or her breasts were less dense, she might prefer the side-lying position. Of course, you would reverse these instructions when you examine your right breast.
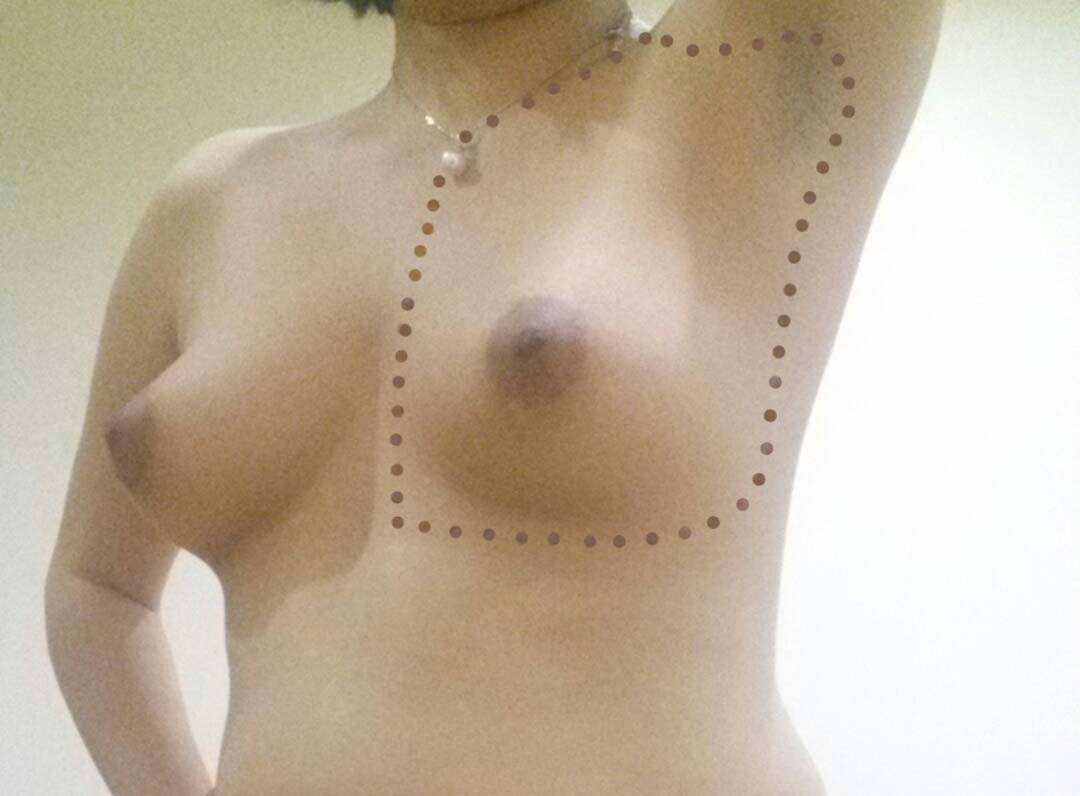
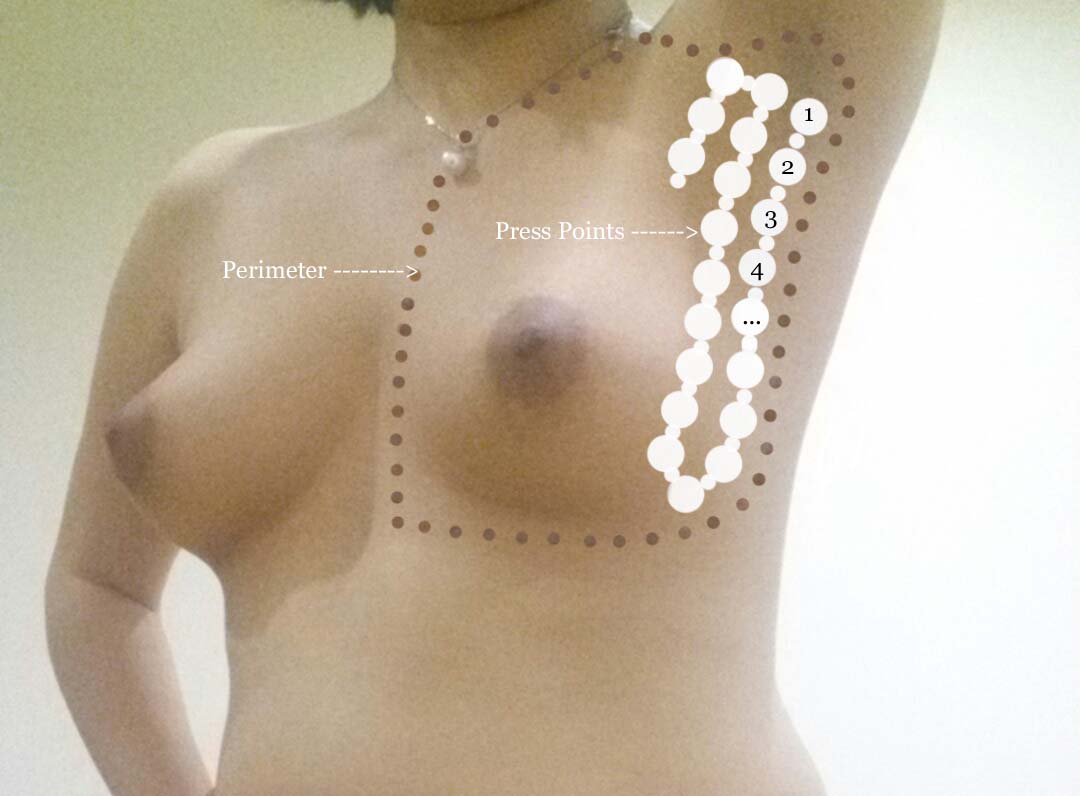
PERIMETER: Define the area where you will be working. Using one of your fingers, trace the perimeter of the breast tissue that is to be examined. Place your finger in the center of your armpit and trace straight down to the bra band line. Follow along the bra band line to the middle of your sternum (breastbone). Now move upward, between your breasts, to your collarbone... the notch in your bone at the bottom of your neck. Follow your collarbone to your shoulder, then down to the starting point in the armpit. You can see the perimeter of the area that you will be checking in this image. This entire area needs your attention when doing a BSE. When examining your right breast, the perimeter will be on the right side of your body, of course.
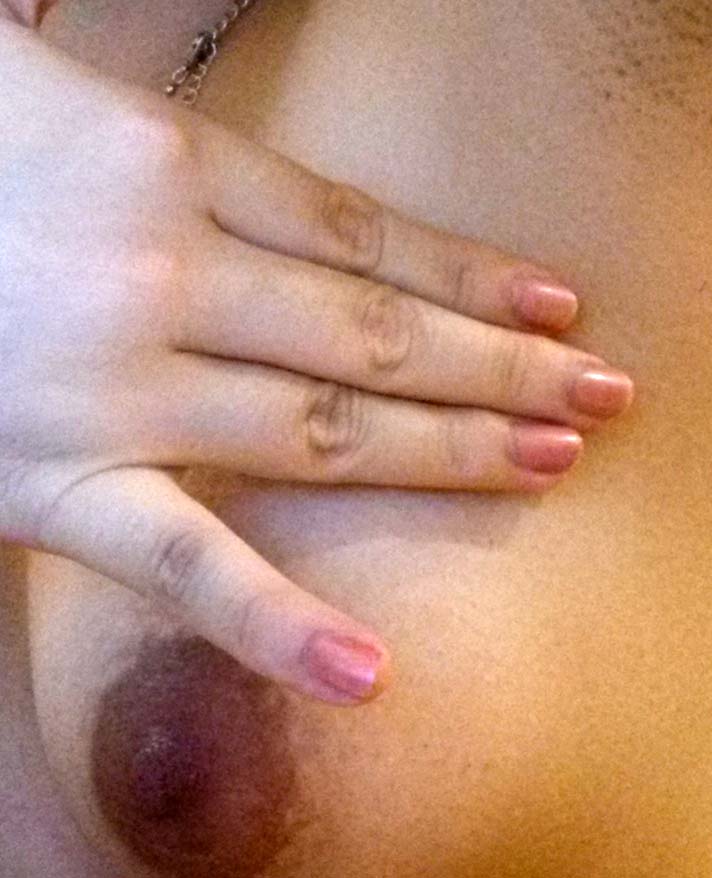
PALPATION: To examine your left breast, either standing or lying down, hold your right hand in the bowed-hand position. These images show an example of how you should hold your fingers:
Use the pads of only your three middle fingers (not the tips, but the pads...where the finger prints come from). Your thumb and your little finger do not touch anything. Keep your three middle fingers together. The four white dots are the first four locations for your middle finger. We will add more in a minute. The model has advanced to her second location. You can see that you move about half an inch and repeat your palpation at each location.
Each palpation consists of three separate movements: Light, medium, and deep penetration. For the first or lightest movement, press onto the surface of your left breast with a very light pressure and move your fingers in a small, dime-sized circle, several times. (Imagine that you are trying to locate a sesame seed just under the surface of the skin.) This photo shows how her fingers are only slightly depressing the skin on her breast.
Keeping your fingers right where they are, press a little harder, to a depth of about one-half an inch, into your breast, and do a couple more circles, searching for anything that may be close to your fingers. Imagine you are using a wash cloth and you are washing out a custard dish with those three fingers.
Now, press to the maximum depth you can, without causing any pain. You should be able to feel some bumpy, dense items. These are your acini tissues... the tissues that produce milk and the tissues that support the weight of your breasts when standing. With your three fingers at that depth, make those circles again.
Each time you make a circle you are feeling for any palpable feature. Do not be in a hurry. Extra circles and a little extra time will only lead to a more thorough knowledge of your breasts and their internal construction. By doing this each month, these features will become familiar to you in time, and you will be able to detect any NEW features that have come into your breasts. Those new features should be brought to your specialist's attention. That is, after all, the purpose of BSE.
Now work your way down toward your bra band line, putting your middle finger on "2", then "3", "4", etc., doing the three circular motions at each number. As you make your way down to your bra band line (we can call this our first "pass"), move (slide) your three fingers downward about 1/2 inch each time. Do not lift your fingers from your skin as you move them over your breast …lighten the pressure and slide them. This will allow you to not only keep track of where you are located in your process, but it will also assist in detecting any small bumps just under the surface of your breast skin. Body lotion, baby powder or a body massaging oil may make the sliding easier. Allow the sensitivity of your finger pads to find what is inside your breasts. Squeezing may be erotic but it is not sensitive enough to feel any problems in your breasts. When you reach your bra band line, move about 3/4 inch toward your breastbone. Now make those same 1/2 inch 'steps' in a similar manner, in a line straight up to the top of your perimeter, doing the circles at three different depths at each 'step'. When you reach the top of your perimeter, again move about 3/4 inch toward your breastbone and start another pass, heading down to your bra band line. Remember, 1/2 inch 'steps' at a time, three depths of circles each step. When you reach your bra band line again, move another 3/4 inch toward your breastbone and start up toward your upper perimeter again. You need to make about ten to sixteen vertical passes (10 for A cup, 12 for B cup, 14 for C, etc.). Continue making a new pass every 3/4 inch across your breast, until you reach your breastbone in the center of your chest. When you reach your breastbone, you have literally felt at three different depths the entire surface of your breast, every 1/2 inch. Because you moved your fingers in small dime-sized circles at each 'step', there is no spot of your breast that you did not check out. When you do this, you may not feel like you are doing anything. But you are doing a lot. You will be able to feel anything suspended in the fatty tissue of your breast. You will be able to feel any new mass that has appeared among your more dense acini breast tissues. If you find something that is questionable, check to see if you have the same thing on your other breast. If so, it likely is normal. If not, let your breast specialist take a look. He/she will be able to determine what it is. If you squeeze your nipple very lightly, you may likely see a drop or two of fluid come from your nipple. This is not unusual, and may be almost any color, from clear to white to green to gray to black, but if it is pink or red, or it has changed since you last checked, it should be brought to a specialist's attention. Take care to check under (behind) your nipple. You will feel lots of things behind your nipple because your nipples have multiple supply ducts coming from the interior of your breasts, and you can feel them. Get used to them... they will always be there. Get concerned if they start to feel differently. Get concerned if one of your nipples seems to be getting pulled back into your breast (inverted). Have that checked out. Check carefully around any surgical incision on your breast. Tumors can flare up around an incision scar from previous breast cancer surgery. If you had a mastectomy, whether you have had reconstruction done or not, be sure to check around the scar every month. You should still do a BSE if you have a mastectomy with or without reconstruction. You can still have a tumor start up in the area where your breast was located. If you have had breast implants, you will need to check everything around the implant. The implant will not become cancerous, but it will be more difficult to check behind the implant, unless your implant was placed beneath (behind) your pectoral muscles. Some women develop extra breasts under the armpit, or just below their 'normal' nipples, or down either side of their abdomen to their pubic area. Each swelling is a breast, and they should be checked just as your two "normal" breasts were. REMEMBER: You are only becoming aware of your breasts. As you can see in the images of our Anatomy section, there are many individual pieces in your breast, and it is difficult to know what should be there and what should not be there. All you want to do is become familiar with what is there now, so that you will immediately notice anything that has changed since your last examination. As you age, your breasts will tend to lose some of their acini or dense tissue, so doing the BSE gets to be an easier process as you age. Familiarity of the inside of your breasts will allow you to notice any future CHANGES. It is those changes that should be checked by your medical provider. If you find any irregularities in your breasts, use a flow-pen and circle where the area of concern is, so you can point it out to your breast-health professional. It will wash off over the next few days. Reposition yourself and readjust to check your other breast. Using your other hand, repeat the examination, starting with tracing out the perimeter (line that surrounds your breast tissue to be examined) of your right breast. RECOMMENDATIONS: Maintain a self-care plan for early breast cancer detection, including:
If you have had breast cancer, or you are considered to have an especially high risk of breast cancer, your doctor may ask you to have one done more frequently (actually, there is usually a series of four images, each breast top to bottom and each breast from side to side). There have been some studies on the negative effects of the radiation from the mammography equipment, and many are suggesting that fewer mammograms should be taken. A good example of the studies can be seen at http://breastnotes.com/bc/bc-causes-singer-mammoscam.htm The American Cancer Society has even lowered their recommendations, telling you to take your first mammogram series at age 45, with another series every year until age 55, and at that point taking them every other year. With less mammograms being done, it increases the need to be especially diligent about doing monthly Breast Self-Examinations.
|